Controlling MedeaWiz Sprite
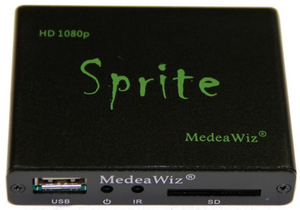
The MedeaWiz Sprite ( http://www.medeawiz.com/ ) is a very small electronic device that plays videos. The videos for the Sprite can be located either on a USB flash/thumb drive or on an SD card. The Sprite will play one video by default in a loop. Other videos located on the flash device can be selected and played using the Sprite remote control.
Purchase from Amazon or TeamKingsley
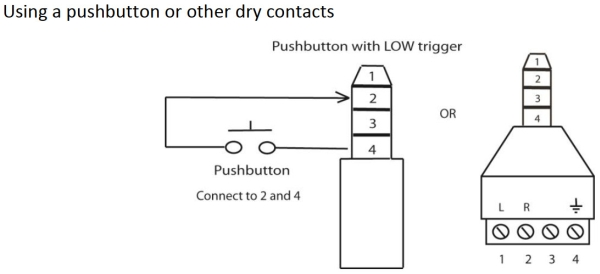
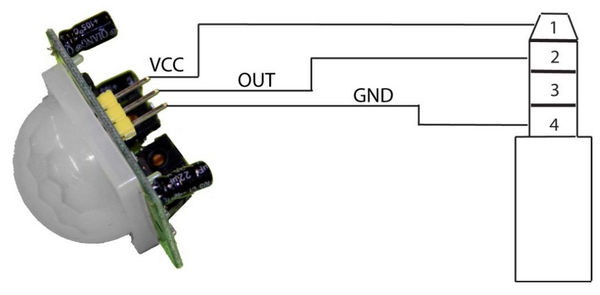
The Sprite can also be triggered by a button contact (or an equivalent "dry contact" circuit) to play a specific video file. The instructions that come with the Sprite (the manual can be downloaded before purchase) show how a button can be used to trigger the Sprite to play a video file. The instructions also show how a Programmable Logic Controller (PLC) or a PIR motion sensor can be connected directly to the Sprite to trigger video playback.
This triggering allows for a button or a device with a dry-contact output to trigger a single file. More complex triggering could be accomplished by using the Sensor.Engine MICRO to evaluate a single or multiple conditions based on sensor input, or scheduled time. The SEM will connect to the Sprite via the Sprite's I/O port and use serial commands to control the Sprite.
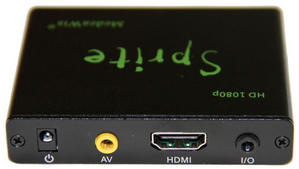
The Sprite I/O port provides a ground connection as well as +5V (100mA) that can be used to power the SEM. Serial control of the Sprite from the SEM is accomplished using the Tx and Rx serial lines. The connections for the I/O port are provided in the Sprite manual and shown here.
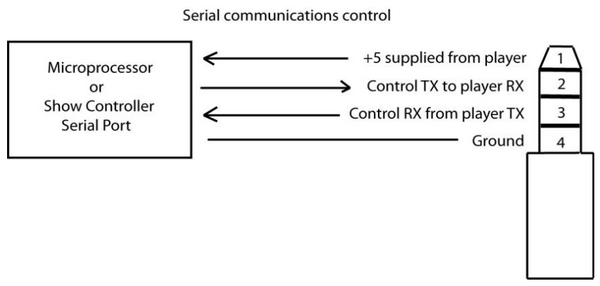
In the diagram above the rectangle named "Microprocessor" will be the Sensor.Engine MICRO. The SEM is connected to the Sprite with a small custom cable. The black wire is ground reference, the red wire provides 5V to power the SEM. (Disconnected during development as the USB connection provides 5V.)
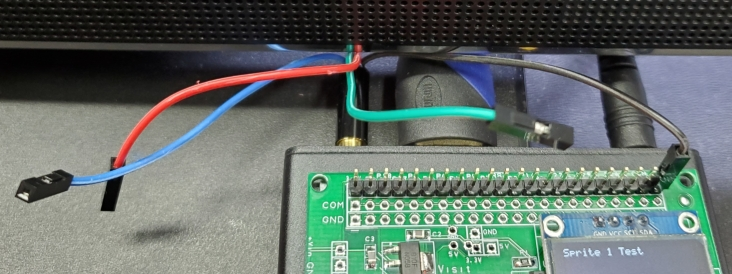
The blue and green wires are serial communication. For this code the data received from the Sprite is not used.
The example program is rather simple: Scroll through a set of numbers ( 0 to 10 ) and when selected, play the file associated with the number.
'Sprite Controller * 4 line program description appears in file selector
' * up to the 21st character after the single appostrophe.
' *
' *
'---------------------*
OPTION EXPLICIT
OPTION DEFAULT NONE
OPTION AUTORUN ON
'====================================================
'Setup Code
'The setup code runs once when you start this program
'====================================================
'S.E:MICRO button interrupts and states
'Common to the SEM apps, etc.
SETPIN 7, INTL, semRedBtnInt, PULLUP
SETPIN 24, INTL, semYelBtnInt, PULLUP
SETPIN 26, INTL, semGrnBtnInt, PULLUP
DIM semRedBtn AS INTEGER 'Button States
DIM semYelBtn AS INTEGER
DIM semGrnBtn AS INTEGER
semRedBtn = 0
semYelBtn = 0
semGrnBtn = 0
DIM FileNum AS INTEGER
DIM FileNumLimit AS INTEGER
FileNum = 0
FileNumLimit = 10
Text 0,0, "Sprite Controller",,3,1
TEXT 64,12, " "+STR$(FileNum)+" ",C,2,2
TEXT 0,57, "Back Frwd Select",,3
DO
IF semRedBtn > 1 THEN
semRedBtn = 0
CLS
FileNum = FileNum - 1
IF FileNum < 0 THEN FileNum = FileNumLimit
Text 0,0, "Sprite Controller",,3,1
TEXT 64,12, " "+STR$(FileNum)+" ",C,2,2
TEXT 0,57, "Back Frwd Select",,3
ENDIF
IF semYelBtn > 1 THEN
semYelBtn = 0
CLS
FileNum = FileNum + 1
IF FileNum > FileNumLimit THEN FileNum = 0
Text 0,0, "Sprite Controller",,3,1
TEXT 64,12, " "+STR$(FileNum)+" ",C,2,2
TEXT 0,57, "Back Frwd Select",,3
ENDIF
IF semGrnBtn > 1 THEN
semGrnBtn = 0
OPEN "COM1:9600" as #1
PRINT #1, CHR$(FileNum);
CLOSE #1
ENDIF
LOOP
'=====================================================
'S.E:MICRO Button Interrupt Subroutines
'Common to the SEM apps, etc.
'=====================================================
'Red/Yellow/Green button interrupt routines
' Standard SEM button routines.
' Testing semRedBtn > 1 for button press, > x for long button press
SUB semRedBtnInt
semRedBtn = 1
DO : PAUSE(5) : semRedBtn = semRedBtn + 5 : LOOP WHILE PIN(7) = 0
PAUSE(20)
END SUB
SUB semYelBtnInt
semYelBtn = 1
DO : PAUSE(5) : semYelBtn = semYelBtn + 5 : LOOP WHILE PIN(24) = 0
PAUSE(20)
END SUB
SUB semGrnBtnInt
semGrnBtn = 1
DO : PAUSE(5) : semGrnBtn = semGrnBtn + 5 : LOOP WHILE PIN(26) = 0
PAUSE(20)
END SUB
The large centered number on the display shows which file is being played, or was last selected.
The red button decrements the file number. The yellow button increments the file number.
The green button selects/plays the numbered file.
If you have more information about certain modules, please feel free to Contact us! and share what you know. If you also have test or application code to share, that link is the way to share that - we would appreciate your experiences and input a lot!
If you are interested in purchasing the unique devices that are shown on these pages, CircuitGizmos (link: CircuitGizmosOnline) sells many of these devices. Also Tindie has several of the CircuitGizmos devices for sale.
If you have questions about sensor modules like these, consider joining the Facebook group. Join the 37 Sensors FB Group! We'd love to see you there. If you are interested in the CircuitGizmos products, the FB page to join is CircuitGizmos on FB
Sometimes the 37 sensor projects are described as Instructables. This is the Instructable user to follow: Indestructable and YouTube channel and even follow on Instagram. Link back to us, please! We really like learning how our products are used.
All content, not otherwise posted with a copyright notice, is Copyright 2017+ to the owner of 37sensors.com.